Portal
Frequently Asked Questions
General
Company is displayed as “Autocreate”
This FAQ is only relevant for Multi Company installations.
In this setup, a central EFR is assigned to an organization. Companies are then automatically identified and linked based on the Tax ID sent by the POS system during each transaction.
In a Multi Company setup, the process is handled automatically by the EFR.
The workflow is as follows:
- The EFR is assigned to an organization
- The POS system sends transaction data, including:
- TL
- TT
- Tax ID
- The EFR checks whether a company with the given Tax ID already exists within the organization
Depending on the result:
- If the company exists
- The EFR assigns the transaction to the existing company
- If the company does not exist
- A new company is created automatically
- This is called autocreate (e.g. AutocreateDE…)
Automatic company creation can lead to unwanted entries if not managed properly.
To prevent this, make sure that:
- the EFR is assigned to the correct organization
- the company is created manually in advance
- before the first transactions are sent from the POS system
This ensures that transactions are assigned correctly and no unnecessary autocreate entries are generated.
Handling autocreated companies
If an autocreate entry has already been created:
- it can be renamed afterward
- assign the correct company name to match your actual setup
Cash register replacement
This article describes how to perform a cash register replacement so that the existing EFR is correctly replaced and no double billing occurs.
Procedure
- Install an EFR on the new cash register and complete the configuration.
- Send one transaction so that the new EFR becomes visible in the efsta Portal.
- Log in to the efsta Portal.
- Click on the new EFR.
- Click on the “Set replacement info” button.
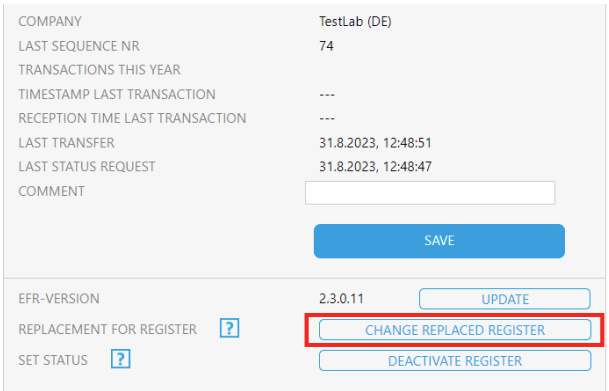
- In the newly opened window, select the old EFR that is to be replaced.
- Choose one of the following options:
- If a fiscal unit (TSE or Certificate) uses the old register, tick the checkbox “migrate fiscal unit”
- Deactivate the fiscal unit of the old EFR and automatically order a new fiscal unit for the new EFR

- Click on “Save”.
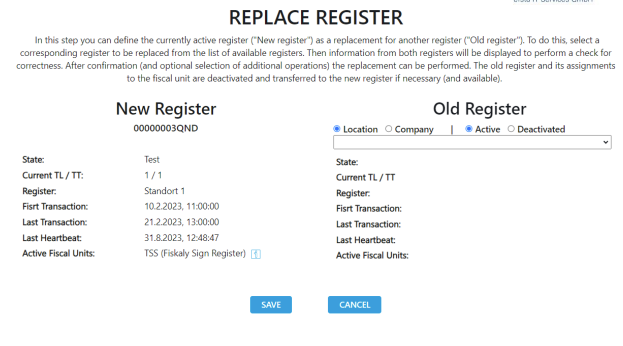
As a result, the old EFR is deactivated and the new EFR is marked as a replacement. This ensures that no double billing occurs.
How can I create a financial export via the efsta Portal?
You can create a financial export via the efsta Portal to retrieve data for a specific company and time period.
The export is generated using a data sharing link, which provides access to the requested data.
Step-by-step instructions
To create a financial export via the efsta Portal, follow these steps:
- Log in to the efsta Portal
- Navigate to companies in the left navigation
- Select the desired company
- Open company options
- Click the „<...>“ (options icon) on the right side
- Open data sharing
- In the new window, go to the “Data Sharing” tab
- Create data sharing
- Enter the required time period
- Click “Data Sharing”
- Access the export
- Copy the generated access key
- Click the link displayed below
- Download the export
- Select the desired export type on the opened page
- Download the required data
The export is now available for the selected time period.
The export works identically on the following levels in the efsta Portal:
- EFR level
- Location level
Releasing updates for companies and EFRs
Releasing an Update for a Company
To release a new EFR version for a company, proceed as follows:
- Log in to the efsta Portal.
- Click on “Versioning” in the lower left menu.
- Select the desired company.
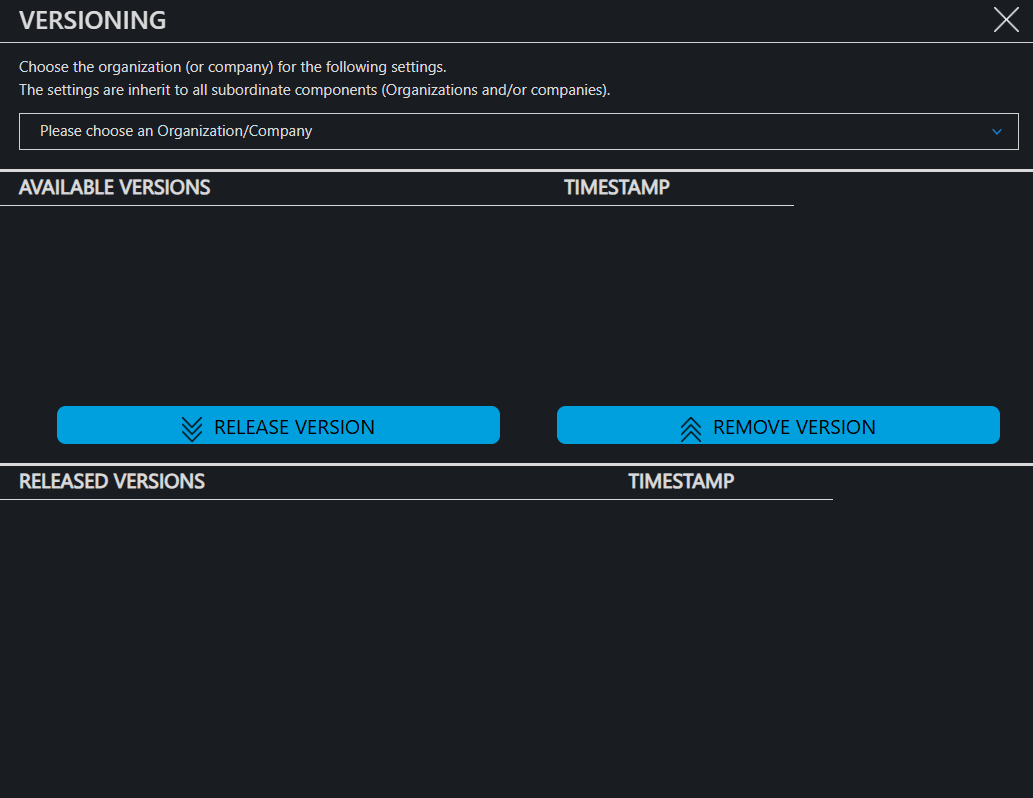
- Release the required EFR version for the company.
If no version is available or new versions are not displayed, the version must first be released at a parent organisation level.
In this case:
- Select the parent organisation of the company.
- Release the required version there.
- Afterwards, return to the company and release the version.
Updating a Single EFR
To update only one specific EFR, follow these steps:
- Navigate to the EFR overview.
- Click on the “…” icon to the right of the desired EFR.
- Select “Update”.
- In the new window, select one of the released versions.
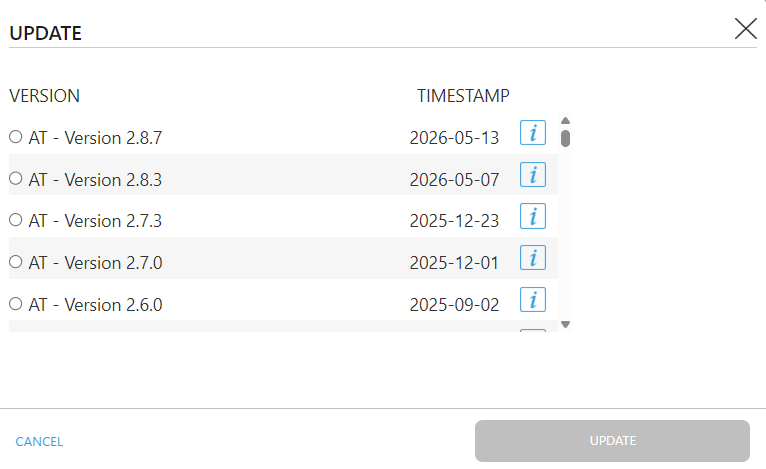
Only the selected EFR will be updated.
Updating EFRs for a Company or Location
To update all EFRs within a company or a specific location, follow these steps:
- Click on the “…” icon next to the desired company or location.
- Switch to the “Edit” tab.
- Click on “Update”.
- In the new window, select the desired version.
All EFRs assigned to the selected company or location will be updated accordingly.
Recommendation
It is recommended to test updates first on a single EFR or test device.
This helps ensure compatibility with:
| Component | Details |
|---|---|
| POS software | Ensures the update works seamlessly with your Point of Sale system. |
| Hardware | Verifies the update functions correctly with existing hardware. |
| Connected peripherals | Confirms compatibility with all attached devices. |
Testing reduces the risk of issues before rolling out the update to all EFRs.
How can I create an export in the portal?
You can create exports directly in the efsta Portal to retrieve data for a specific organization or company.
Exports can either be viewed as a preview or downloaded as a complete dataset.
Step-by-step instructions
To create an export in the portal, follow these steps:
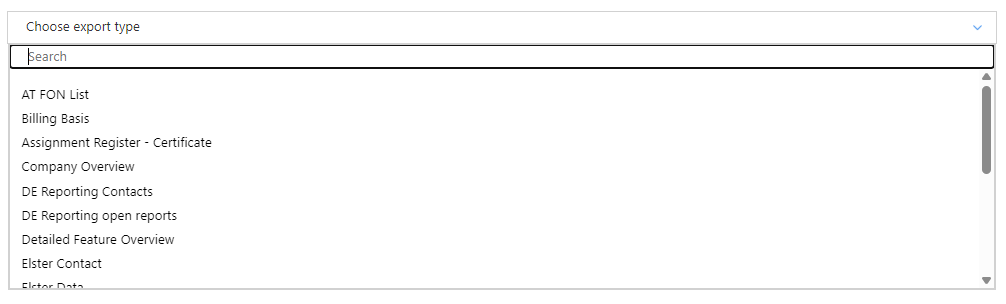
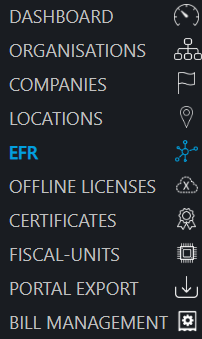
- Navigate to the “Portal Export” menu
- Select the desired export type from the dropdown menu
- Choose the relevant:
- organization, or
- company
- Enter the required time period for the export
View or download the export
After defining your export settings, you have two options:
- Display export
- Display the export directly in the portal
- Useful for quick checks
- Download as CSV
- Export the full dataset
- Includes all data within the selected time period
Choose the option that best fits your use case.

How can I send invitations to the efsta portal?
You can invite new users to the efsta Portal by sending an invitation link via email.
The process can be started either directly from the organization structure or via the user management area.
1. Open the invitation dialog
You have two options:
- Click the “Add user” icon (+) next to the desired:
- organization
- company
- or location
This option automatically selects the correct context.
or
- Open Users in the menu on the left
- Start the invitation process manually
2. Enter user details
In the pop-up window:
- Enter the email address of the person you want to invite
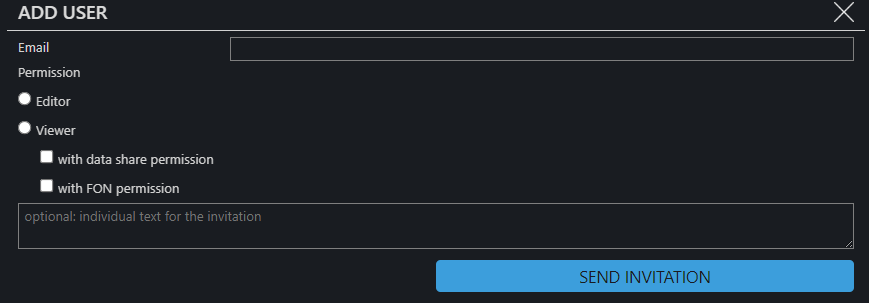
3. Assign permissions
Select the appropriate role for the user:
- Editor (Admin)
- Can edit data
- Can create companies
- Can deactivate EFR
- Viewer
- Read-only access
- Can optionally approve data
- In Austria: can use FON (FinanzOnline) permissions
4. Send the invitation
- Click “Send invitation”
The invited user will receive an email with an invitation link.
- Invitation links should only be sent by a cash register manufacturer or efsta employee
- The invitation link is valid for 10 days
Data Pending
New register at Data Pending
This FAQ is relevant if the register has shown the status "Data Pending" for longer than six months.
Cause of Data Pending
This state usually occurs when the same SQ number is used multiple times in the background.
This can happen, for example, if:
- data was copied,
- a clone operation was performed, or
- a backup was restored
in the process, older data records are sent to the cloud again.
Information about the SQ number can be found here https://docs.efsta.eu/efr/api/rule-set/#internal-sq
EFSTA Cloud behavior
- The EFSTA Cloud detects the duplicate SQ numbers and automatically “pauses” receiving the data
- The affected data is moved to a separate, temporary EFSTA Cloud
- The EFR continues to send data, which is also transferred to this temporary cloud until the issue is resolved
Why should a new register be created if the status “Data Pending” has been present for longer than six months?
Due to the large volume of accumulated data, the “Data Pending” status for the affected EFR, which is still actively sending data, can no longer be resolved properly.
The data can only be processed correctly once the affected EFR is no longer in active operation. Therefore, the current EFR should no longer be used.
To continue operations properly, a new EFR must be set up.
As soon as the new EFR has been set up, please send us an email at ticket@efsta.eu so that we can process the “Data Pending” entries of the old EFR and, if necessary, coordinate the next steps with you.
What is the Portalmessage 'datapending'?
Data pending occurs when there is manual intervention in the data.
Such interventions include
- Uploading or importing images
- Performing backups or system resets
- Use of the EFR in clone mode
- Incorrect cash register change
- Copying data
Deactivating
How can I deactivate a TSE in the efsta portal?
Please find more details about this issue in the Germany FAQs - TSE - How can I deactivate a TSE in the efsta portal? https://efsta.atlassian.net/wiki/x/pYCnDw
How can I deactivate an EFR in the efsta portal?
- Navigate to the Fiscal register (EFR) section and select the desired register
- Click on the
...symbol next to the register to open the properties window - There, select the “Deactivate register” button, which opens the following pop-up window
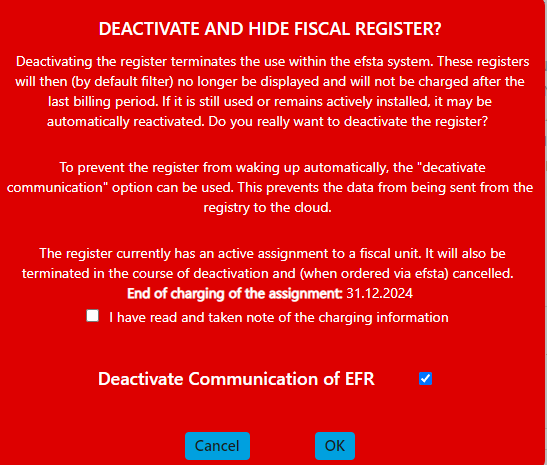
- Read the information carefully and confirm the necessary statements
Deactivated tabs are only visible in the Portal if you activate “Show deactivated tabs”.
![]()
Ordering
How do I order offline licenses for my company?
To order offline licenses, follow these simple steps in the efsta portal:
- Go to the “Orders” menu item
- Select the desired company
- Enter the desired number of units, location ID (TL) and cash register ID (TT) (TL and TT are assigned by the cash register software manufacturer)
- Accept the terms of use and click on “Continue”
- Check the data you have entered and make changes if necessary
- Click on “Continue” again
- Here you will see a summary of your order
If the automatic renewal option for offline licenses is activated in the portal, you will receive an e-mail notification 3 months before expiry.
One month before expiry, a new license is automatically created with the same properties and validity for one year.
This can be entered into the EFR immediately. The automatically issued license will be invoiced in the same way as any license ordered manually in the portal.
How do I place orders in the efsta portal?
- Navigate to the “Orders” menu and select your company from the drop-down menu

- Then select the desired country and item
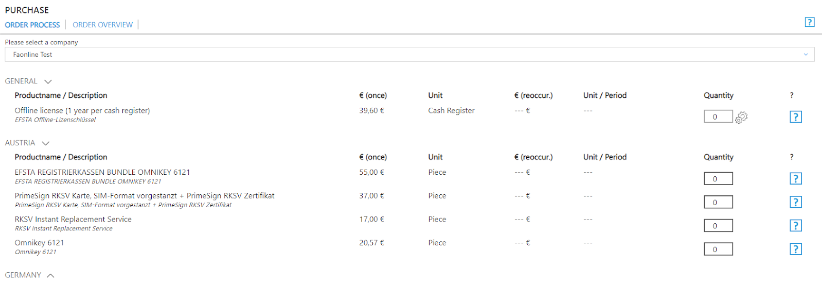
- Read the terms of use and click on “Continue”

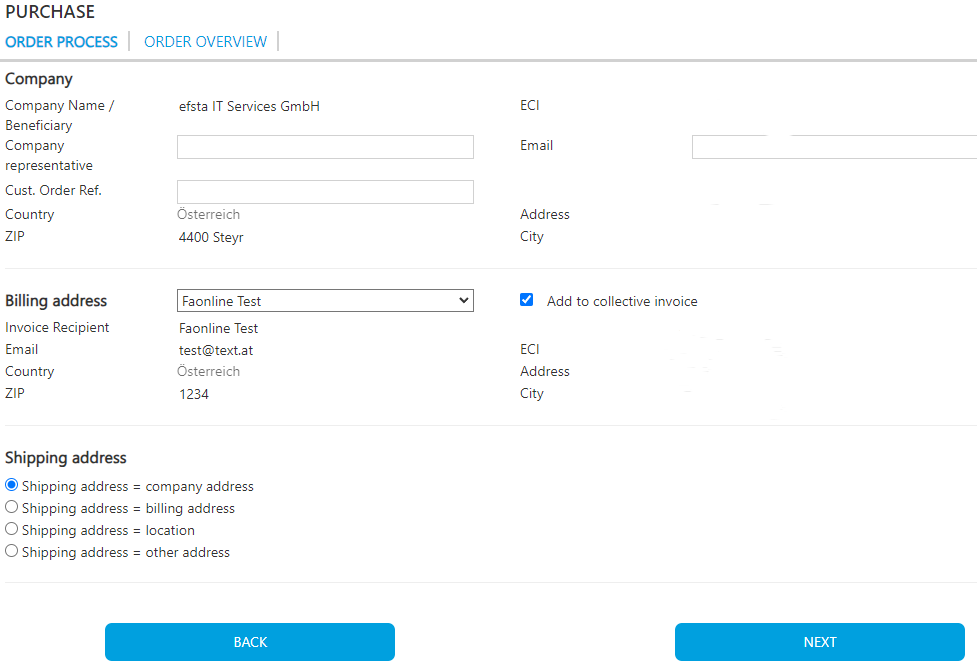
- Enter the company address and select the stored billing address
- If necessary, you can change the delivery address
- Finally, click on “Send order”
- After you have submitted your order, you will receive a summary of your order
- Check the summary of your order and confirm it to complete the order process
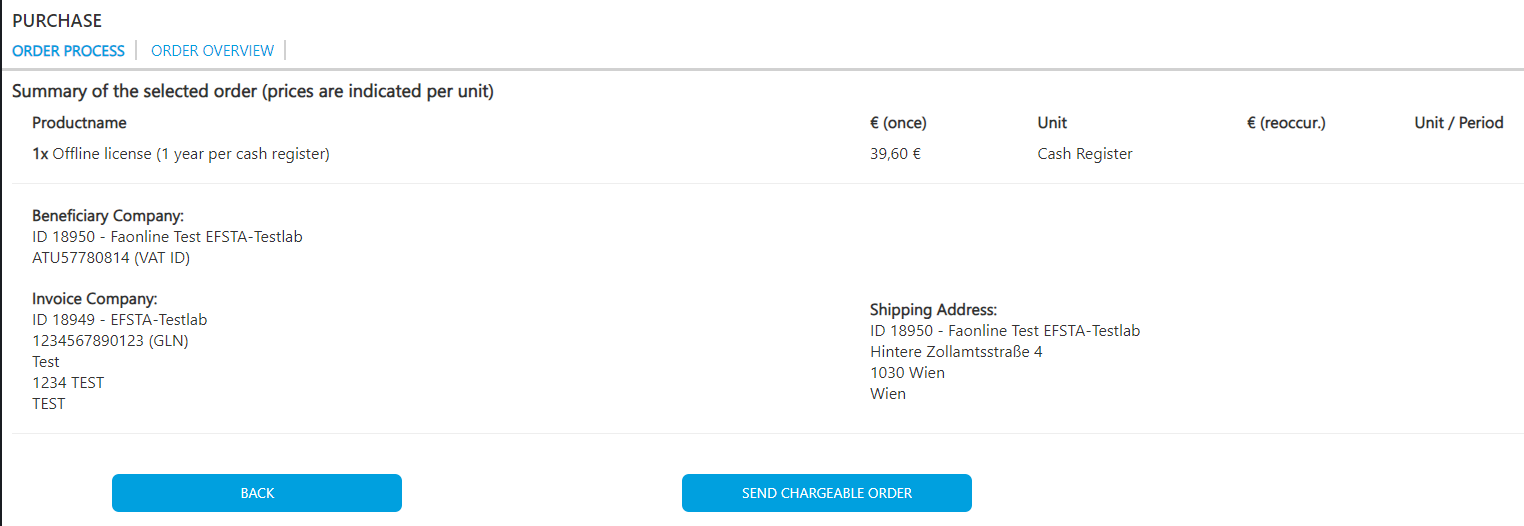
- Simply click on the corresponding confirmation button
How do I order a TSE in the efsta portal?
Please find more details about this issue in the Germany FAQs – How do I order a TSE in the efsta portal?
Structuring
How can I create a test company with test licenses?
- Log in to the efsta Portal
- Select the company view in the menu bar (top left)
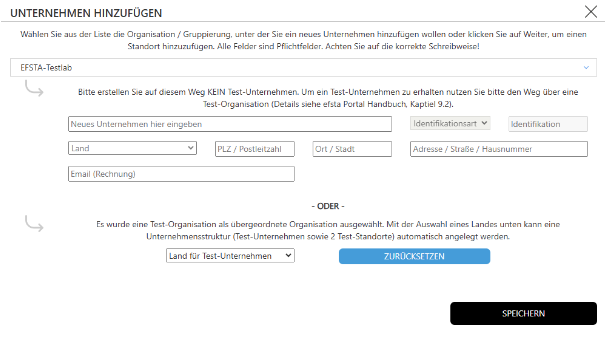
- Click on the “Add” button

- Select a test organization as the parent organization.
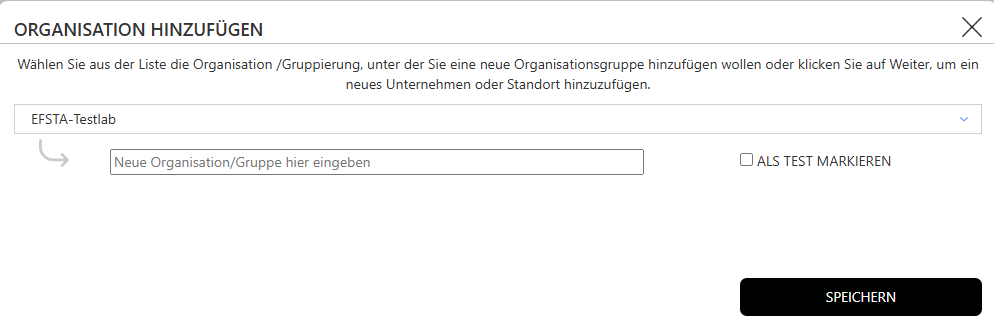
- If you do not have a test organization, click the “Add” button at organization level in the efsta Portal
- select the desired organization from the drop-down menu
- enter the desired name of the new test organization
- and check the “Mark as test” box
- Save
- Select the desired country from the “Country for test company” drop-down menu below.
- This automatically creates a test company and two locations if you have selected a test organization as the parent organization.
- Click on the 3 dots next to the newly created test company and enter the required data in the “Edit” tab.
- Then open the page https://public.efsta.net/efr/#/AT/
- Install the desired EFR
- Enter localhost:5618 in the address bar
- In the “Profile” tab, enter the badge of the newly created test company (you can find this in the efsta Portal by clicking on the 3 dots next to the company)
- In the Sign_require field, enter Prime-Sign (this will give you a test license)

- Please leave the remaining fields blank unless you use advanced settings by entering attributes
- Save
How can I create companies in the efsta portal?
Before you create your desired company, it is important to check whether the parent organization has already been created in the efsta portal.
- Click on the company view in the menu bar (top left)
- Click on the “Add” button
- In the drop-down menu, select the organization to which you want to add the new organization
- If you have permissions for more than one organization, select the desired organization from the drop-down menu
- Enter the name of the new organization in the empty field below the drop-down menu
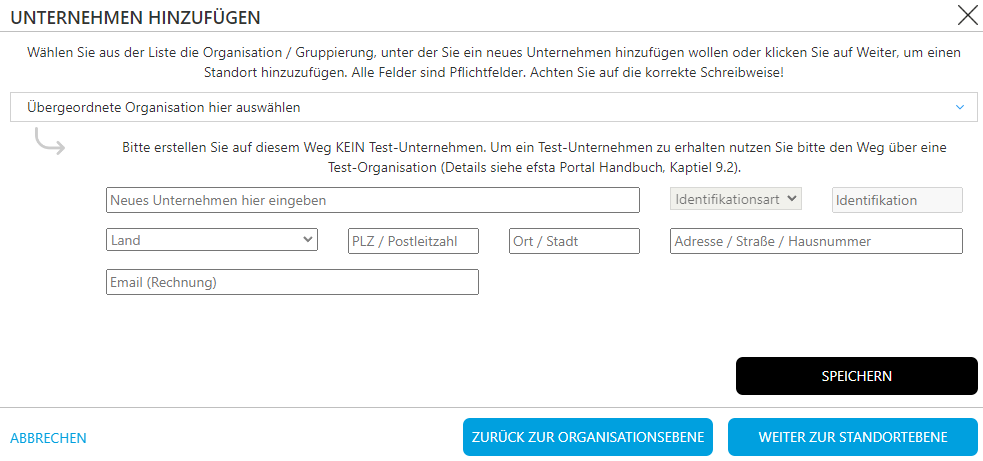
- Fill in all the required fields
| Field | Meaning |
|---|---|
| Select parent organization | Organization to which you want to add your company |
| Enter new company here | Name of your company |
| Identification type | first select the country so that the identification type is listed. e.g. UID in Austria and Ust-Id in Germany |
| Identification | Enter the identification, e.g. Austrian tax number, UID... |
| Country, zip code, city, address | company data |
- Click on the “Save” button
How can I create locations in the efsta portal?
- Click on the location view in the menu bar (top left)
- Click on the “Add” button

- Select the desired company:
- If you are authorized to multiple companies, select the company you want to add the new location to from the drop-down menu
- Name the new location:
- Enter the name of the new location in the free field below the drop-down menu
- Field “INTERNAL FILIAL ID”: Enter the branch number or the TL (Terminal Location) here
- The number can be freely selected, but is not checked
- Recommendation: Use the store numbers from your merchandise management system
- Save the changes
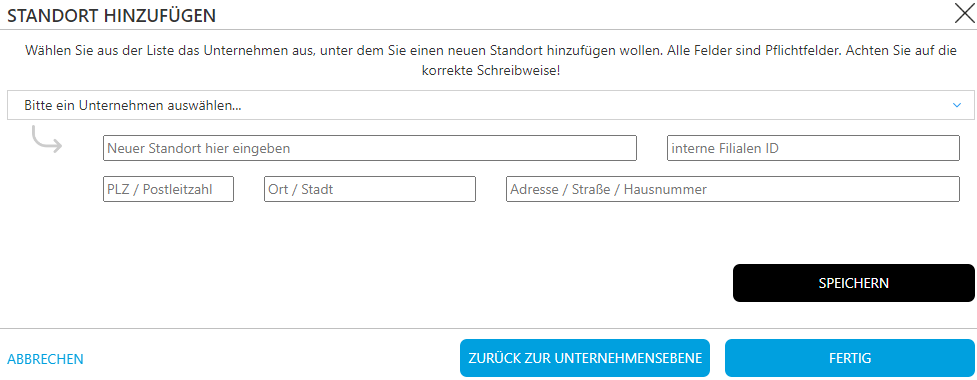
- Click on the “Save” button
How can I create organizations in the efsta portal?
New components can be added either individually and manually or automatically via CSV import (recommended for more than 10 components). Editor authorization required to add components.
- Click on the dashboard or the organization view in the menu bar (top left)
- Click on the 'Add' button

- In the drop-down menu, select the organization to which you want to add the new organization
- If you are authorized to several organizations, select the desired one
- Enter the name of your new organization in the free field below the drop-down menu
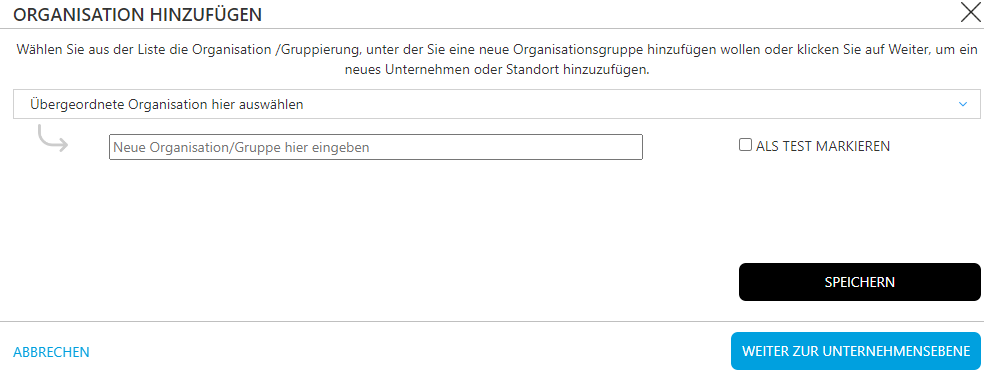
- Click on the “Save” button
How do I structure customers by organizational units?
To ensure effective management and categorization of your clients, we recommend the following structure in the efsta portal.
This structure enables efficient customer support and simplifies billing.
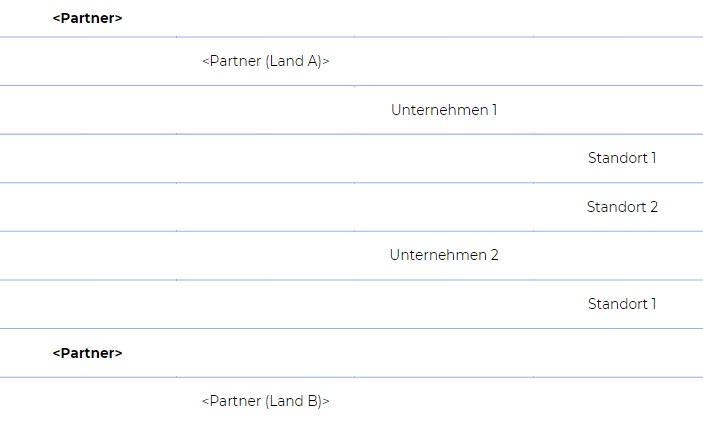
- Country organization:
- Create a country organization for each country in which your customers are active.
- Company organization:
- Below each country organization, create a customer organization for each individual customer. This level enables a fine subdivision and categorization of customers.
- Locations and branches:
- In the customer's organizational unit, you can create the company with at least one location (branch). Any number of additional locations can also be added to create a comprehensive structure.
Advantages of this structure:
- Improved overview and control:
- A clear hierarchy enables simple and quick navigation.
- More efficient customer management:
- Each customer has its own organizational unit for targeted management.
- Customized settings:
- Flexibility for customer-specific adjustments and settings.
- Flexible billing control:
- Better control of billing at customer and country level.
Recommendations for naming companies and locations:
- Company:
- Use of the correct company name according to the company register.
- Location:
- Designation with at least city and street.
- Optional additions: House number, floor, etc.
- Example:
- Company: “Mustermann GmbH”
- Location: “Musterstadt, Musterstraße 12”
The correct and unambiguous designation facilitates assignment and identification.